
- Week 25
- Week 26
- Week 27
- Week 28
- Week 29
- Week 30
- Week 31
- Week 32
- Week 33
- Week 34
- Week 35
- Week 36
- Week 37
- Week 38
- Week 39
- Week 40
- Week 41
- Week 42
- Week 43
- Week 44
- Week 45
- Week 46
- Week 47
- Week 48
- Week 49
- Week 50
- Week 51
- Week 52
- Week 53
- Week 54
- Day 155
- Day 156
- Day 157
- Day 158
- Day 159
- Week 55
- Week 56
- Week 57
- Week 58
- Week 59
- Week 60
- Week 61
- Week 62
|
Today, I had a pretty productive day, starting with finishing last night's work on the handbrake warning light.
I then tightened the bolts, and used yellow enamel paint to mark them - so I know which ones have and haven't been tightened. I did a lot of this today.
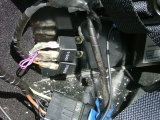
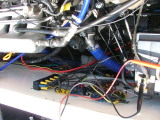
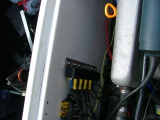
Next, I put some rivnuts in the passenger panel for the two relays.
I wanted to get the alternator sense light drive a relay, so the charge cooler water pump would only turn on when the engine was running. I couldn't get it to work - however, after reading a datasheet on a chip that goes in the alternator, I realised the alternator needs power for the sense light to work correctly. So, I wired it up.
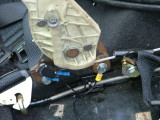
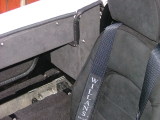
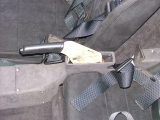
And that made it work. I added an extra relay so that when the ignition is on, and the alternator isn't spinning, the alternator sense light is on, and when the alternator is spinning, the pump is on. In order to make the keep the relays together, I used a length of aluminium bar with holes drilled in it. Each end of the bar is bolted through the rear panel (I've left an extra space in case I need another relay).
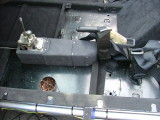
The electrics are now pretty much done - the only one I need to worry about is the radiator fan itself. The cable's routed down the side, but since I haven't got the radiator fan yet, I'll wire it later. I had a bit of a tidy up in the nearside sill. I'll be leaving the sill panels off for the moment, in case I need to route some more wires (shouldn't need to!) One of the problens with the central bit of the gear cable cover was that there was a join down the middle, where the combination of two curves forced me to cut it. I'd discussed this with Chris while he was over, and we'd decided that another bar with alicante on it would cover it - so I now made it. It's glued to the cover, and also bolted to it.
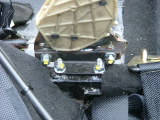
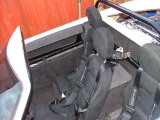
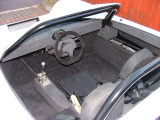
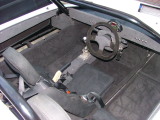
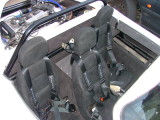
The gearstick is now properly bolted to the floor (with paint on the bolts), using M8 buttonheads and penny washers (so they don't protude too much below the floor). So, I bolted the seats to the floor (the driver's seat needed to have some filing of the holes, but the offside passenger seat needed a slight widening of one hole (I hadn't tested this seat). All the bolts have threadlock on them, and also tightened up quite tight - and put yellow paint on them.
I then got the rear side panels in place - I found that the panels that sit between the rear bar and the body needed to be done before the seats were fitted - which luckily I'd done.
The only things I need to make for the interior now are the gearstick and handbrake gaiters. I made some for my first kit car that turned out all right, so these should be okay.
The last thing I did was to go around the rear roll bar brace bolts, tightened them up, and painted a mark on them - and also the engine mounts. So, that's the interior and the electrics pretty much done. I need to tidy the electrics at some point - probably next week. This doesn't leave a lot to do... |
Copyright © 2005-2007 Tribbeck.com / Jason Tribbeck