
- Week 25
- Week 26
- Day 90
- Day 91
- Day 92
- Day 93
- Week 27
- Week 28
- Week 29
- Week 30
- Week 31
- Week 32
- Week 33
- Week 34
- Week 35
- Week 36
- Week 37
- Week 38
- Week 39
- Week 40
- Week 41
- Week 42
- Week 43
- Week 44
- Week 45
- Week 46
- Week 47
- Week 48
- Week 49
- Week 50
- Week 51
- Week 52
- Week 53
- Week 54
- Week 55
- Week 56
- Week 57
- Week 58
- Week 59
- Week 60
- Week 61
- Week 62
|
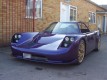
I've never done any seat trimming before, but I decided to have a go at it - the foam and additional Alicante turned up today, so why not? I'd bought a driver's seat from Aeon in April - this is what it looks like:
The foam was quite large - larger than I envisaged it. I cut it to 38cm wide, and also in half (so about 4.5cm deep). This was one sheet - and I'd bought three!
I then cut the bottom to the right widths (after marking the widths at certain key points):
And also the top:
And using the remainder of the base, I made a top:
Which I then rounded off:
Next, I got the tub of contact adhesive, and pasted the two parts of the back together:
And after it had stuck:
Maybe I'd watched too many car restoration programs, but I decided to have a go at putting pleats in the base - it I made a mistake I would be able to cut a new one fairly easily. So, I got a sharp Stanley blade, measured some slots 6cm apart, and then cut grooves into the base foam:
The first groove was at tha back, and I didn't do a very good job of it. However, the rest looked quite good! I then cut out a square of Alicante, and covered it. Since this needed to be done fairly quickly, I didn't take any pictures of the top being glued in place. However, when it was done, I was fairly pleased with it.
I then glued the back, then the sides and finally the front to the underside:
By the way, I am doing this in the kitchen, because I was able to keep the back door open and take the fumes away. Finally, I got some black thick board (like MDF, but a bit more flexible) and stuck it to the underside. Sorry about the exposure of this picture - the camera got a bit confused!
And as a last test, I put it in the seat:
There's a bit of creasing in the far back corner, but the back foam should hide a lot of it.
Tomorrow, I'll put some pleats in the back, and cover it with Alicante (assuming I don't run out of contact adhesive - the base took a fair amount of glue). |


Copyright © 2005-2007 Tribbeck.com / Jason Tribbeck