
- Week 25
- Week 26
- Week 27
- Week 28
- Week 29
- Week 30
- Week 31
- Week 32
- Week 33
- Week 34
- Week 35
- Week 36
- Week 37
- Week 38
- Week 39
- Week 40
- Week 41
- Week 42
- Week 43
- Week 44
- Week 45
- Week 46
- Week 47
- Week 48
- Week 49
- Week 50
- Week 51
- Day 152
- Week 52
- Week 53
- Week 54
- Week 55
- Week 56
- Week 57
- Week 58
- Week 59
- Week 60
- Week 61
- Week 62
|
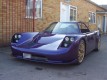
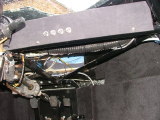
It's now getting to the point that the passenger compartment is getting complete - so while I didn't complete it today, I'm still saying it's part of the completion process! While carpetting the chassis rails, I took off all the hose clips holding the brake, accelerator and clutch cables - they needed refitting. The first thing I did was cover the brake and accelerator with some plastic protection (they shouldn't ever touch the harness, but it's a precautionary mesaure).
I covered this with some tape to prevent it from moving, and then fitted several self-adhesive cable tie holders that were also screwed into the chassis with some self-tapping screws (they really shouldn't move!)
I then did the other side - although there's only one cable to do. This also had some plastic protection near the harness hoop.
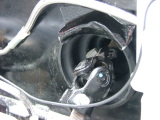
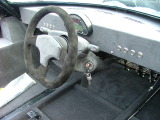
Using a spare CV joint boot, I made some protection around the steering column to prevent dirt and water from coming in. This was bonded using Sikaflex.
And some tape on the other side to stop it from moving.
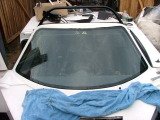
I then set to work on the washers - it's very difficult to get them done right, as they're pretty low down and the windscreen is very flat. Either the passengers get wet, or the car behind gets a wash, or only the lower part of the windscreen gets wet. So I settled for a bit of spray for the passengers (this should only occur when the car is stationary).
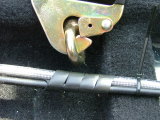
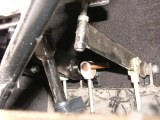
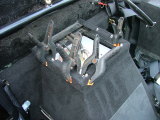
After a lot of sanding, I got the brake bias mechanism working well.
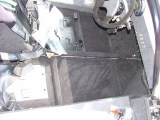
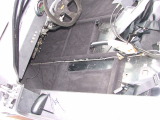
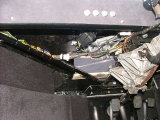
I carpetted the very front of the passenger footwell area (I won't bother with the driver's footwell), and while I was under the dashboard, I cabletied a lot of the under dash wiring so it's not visible from the seats. This also involved plumbing the windscreen blower to the vents.
None of the wiring is now visible from the normal position - and I may even make some panels for under the dashboard area. I fitted the bottom of the steering column surround (where the rubber had nicely stuck in place).
Next, I stuck some carpet to the extension I made to the fuel tank section.
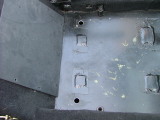
And finally, I made the holes for the main driver's seat bolts big enough for the bolts themselves (I also made them slightly over size in case they're not quite in the right place).
All in all, the interior is getting complete. I need to get some flowcoat for the sides and doors, carpet the back of the passenger section, put some rubber edging on the back as well, and fit the offside door opening cable. |

Copyright © 2005-2007 Tribbeck.com / Jason Tribbeck