
- Week 25
- Week 26
- Week 27
- Day 94
- Day 95
- Day 96
- Week 28
- Week 29
- Week 30
- Week 31
- Week 32
- Week 33
- Week 34
- Week 35
- Week 36
- Week 37
- Week 38
- Week 39
- Week 40
- Week 41
- Week 42
- Week 43
- Week 44
- Week 45
- Week 46
- Week 47
- Week 48
- Week 49
- Week 50
- Week 51
- Week 52
- Week 53
- Week 54
- Week 55
- Week 56
- Week 57
- Week 58
- Week 59
- Week 60
- Week 61
- Week 62
|
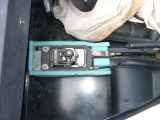
This was where the gearstick wanted to be - although it's about 10cm further forward than I want it.
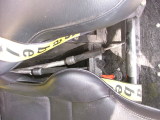
I can cut some of the foam near the seat, but the handbrake will need some adjusting. Anyway, I found out how far the cables would reach in this position:
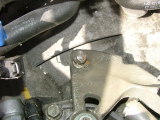
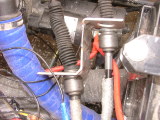
This is pretty close to where they need to be, which means it'll require a very short extension to work. The first thing I needed to do was remove the Audi TT ball used to select the 1st/2nd gears:
After a bit of cutting, drilling and angle grinding, it was gone, leaving an M8 hole:
This allows an M8 bolt to be put through, and the other Seat cable mounting:
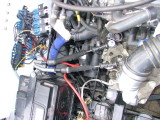
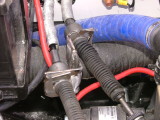
This was my first check as to how the cables would route through from the main section:
Looking good! Now to make the bracket to hold the cables. This is the bracket that I got earlier. Although I decided I wanted to make this operation reversible if it didn't work, cutting this bracket up to make the other side is fairly reversible - just buy a new one! There's a VW part number on one of the lugs, so I kept that.
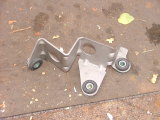
After a bit of cutting, and welding an extension to it, I had this:
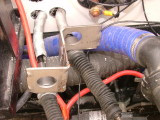
I then made some tags to hold the cables in place:
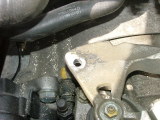
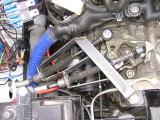
They worked so well, I may actually use them - they're difficult to remove. Unfortunately, there aren't too many points which I can bolt a new bracket on, so I used one of the gearbox mounting bolts, and one of the starter motor bolts as mounting points. And after a bit of welding, I had the bracket held very securely:
Wow - I didn't even need to adjust the cables - it just worked. I was able to select all the gears with no difficulty. This means I'll keep this operation, but I'll have to work out the cable lengths next weekend. I took the brackets off, and painted it.
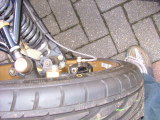
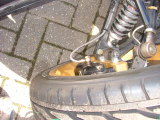
One thing I'd forgotten to do earlier was to check the brake cables at each end of the steering lock. Firstly, with the steering to the right:
And then to the left:
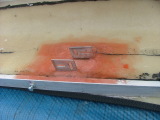
That seems to work very nicely! Just need to get some brake cables and shoes for the front, and it'll be ready for bleeding. And one final job for the day was to put some GRP over the door brackets that hold the door panel to the internal door bar.
I had to do this because a couple of times the bracket had been pulled off - the Sikaflex isn't quite strong enough for this. Now, they don't move at all. |


Copyright © 2005-2007 Tribbeck.com / Jason Tribbeck