
- Week 1
- Week 2
- Week 3
- Week 4
- Week 5
- Week 6
- Week 7
- Week 8
- Week 9
- Week 10
- Week 11
- Week 12
- Week 13
- Week 14
- Week 15
- Week 16
- Week 17
- Week 18
- Week 19
- Week 20
- Week 21
- Day 75
- Day 76
- Day 77
- Day 78
- Day 79
- Day 80
- Day 81
- Week 22
- Week 23
- Week 24
|
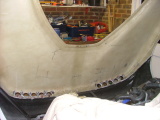
Yesterday, I'd done the offside rear body corner, and today I did the other side.
This is a lot closer than the other side (I'd learnt from my mistakes!)
I also welded a bracket to take the other wire rope on the rear section.
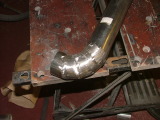
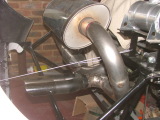
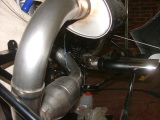
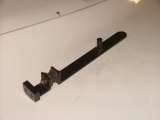
Then, my extra exhaust bits turned up, so I carried on with it. First of all, I needed a tight right angle in order to fit the new tailpipe.
This took quite a long time - and I was quite lucky with the angle I achieve, because I didn't do any calculation whatsoever. I just cut four 1" v-shaped slots every 1.5", and was surprised when I bent it that it was 90° This was what I ended up with.
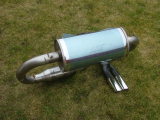
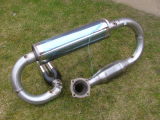
I then took it off the engine and took pictures of it outside. Later on, I'll get them TIGged.
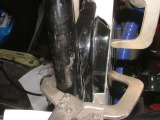
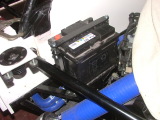
I then fitted the battery and stand.
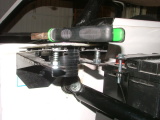
The strap is covered in loom tape to prevent any accidental short circuits. It's actually very strong, and doesn't move at all. The other day, I'd had a slight accident with the filler cap when the bolts got snappe off. I made an aluminium plate to hold them down, and all of them are Sikaflexed in place.
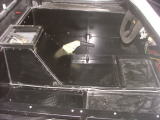
I then cleaned out the interior, and put Sikaflex on the corners of the rear sections where the seats will lie.
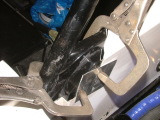
I've got a lot of dust on the camera lens now, so tomorrow I'll get some cleaner. That's why there's a lot of "fog" when there's a strong reflection. Another thing I've been working on for a bit is the gearbox mount. I'd originally made it solid, but it needed to have a rubber bit to allow some movement. This is an exhaust bobbin.
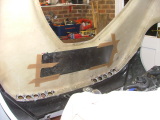
The next job was to stick an aluminium sheet to the underside of the rear section above the exhaust - when it was there, I drew a rough outline of the area I wanted to cover.
And this is the sheet in place (held down with packing tape - masking tape wasn't strong enough).
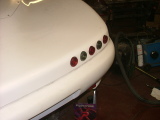
I then wanted to put all the rear lights back in - some of the threads had become covered in dirt, so they needed cleaning with a die. I'd forgotten how much I liked it!
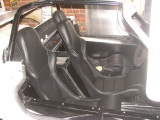
And the final touch was to put the three seats in.
Unfortunately, the nearside seat interferes with the handbrake, so I'll have to do something about it (either move the handbrake over a bit, or move it up). |

Copyright © 2005-2007 Tribbeck.com / Jason Tribbeck